
Fleet Ambush Objective card

How-to play Objective "Fleet Ambush" - Star Wars Armada Explained (SWAE)
Instructions and hints by Karneck
Card Text[]
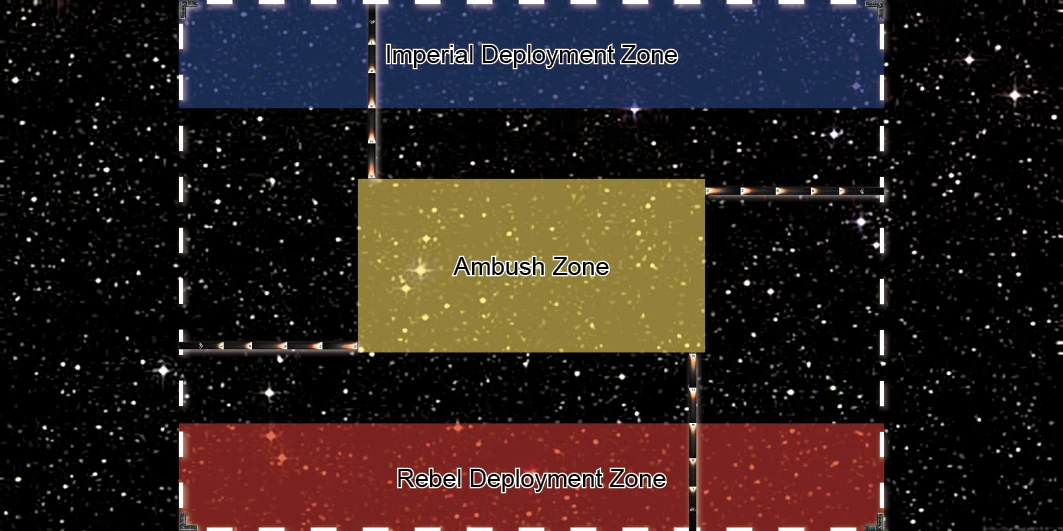
Setup: The portion of the setup area that is beyond distance 5 of any edge of the setup area is the Ambush Zone. Players mark the corners of the ambush zone with objective tokens.
Players take turns deploying fleets as normal but must deploy all ships before deploying any squadrons. The first player must deploy ships within the ambush zone on his odd-numbered deployment turn, starting with his first turn. He cannot deploy ships or squadrons overlapping obstacles in the ambush zone. After setup is complete, he removes all objective tokens from the play area.
Rules Clarification[]
After a player has placed all of his ships he begins placing squadrons on his next deployment turn. The other player continues placing ships until all of his ships have been placed, then he begins placing squadrons.
The first player can deploy squadrons within distance 1–2 of a ship inside the ambush zone.
If a ship must be deployed into the Ambush Zone and cannot fit without overlapping obstacles or extending beyond the Ambush Zone, the player must deploy that ship so that the ship fits as completely into the Ambush Zone as possible.
Source: FAQ 5.1.1; 2020/03/09
Setup Diagram[]
Task Force Rule[]
This objective is not recommended for Task Force play.